Software Manual
Introduction
Please read the software manual carefully and follow the instructions below to ensure safe and optimal use of your ZENIQ Hub.
Main menu
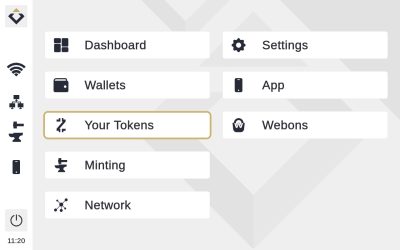
DASHBOARD
Under the “Dashboard“ entry of the main menu you will find the balances of your assets and general information about the tokens you purchased. By clicking on one of the wallets you will be forwarded to the respective wallet. You can select which balances are shown for all three tiles on the dashboard.
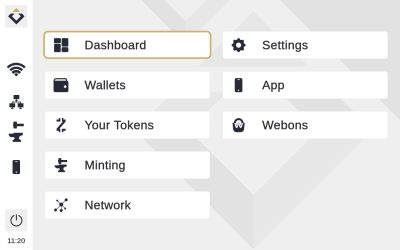
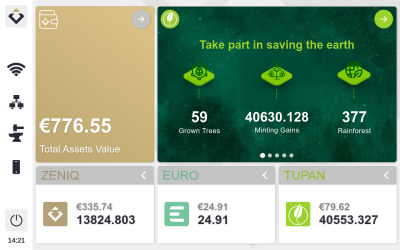
Main menu
WALLET
Under the menu item „Wallet“, you will find your private wallets:
- ZENIQ wallet
- EURO wallet
- TUPAN wallet
- ZENIQTOKEN wallet
- SIDI wallet
- REGARDLESS wallet
- ZENIQ Token on Ethereum wallet
- ZENIQ Token on Binance wallet
- DGT Token
- TDrone Token
- Voo Token
- Avinoc Token
- SGI Token
- Desert Pearl Token
- NOMO Token
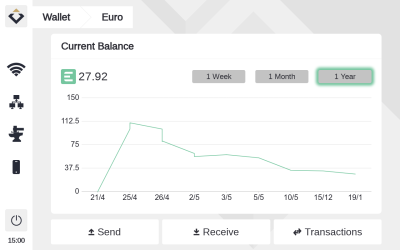
By clicking on either one of the wallet cards, you can see an overview of the balance and the history of the assets transactions displayed in the line chart. The line chart is the height of your balance over time that includes both minting and regular transactions, which have both been recorded since day one.
You can select different line chart range: 1 week, 1 month, or 1 year.
There are three buttons available that are explained below:
a.) „Send“ button
b.) „Receive“ button
c.) „Transactions“ button
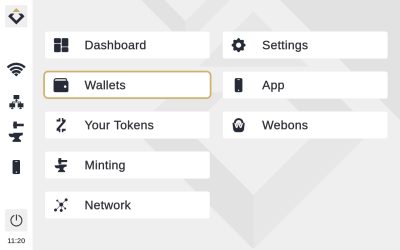
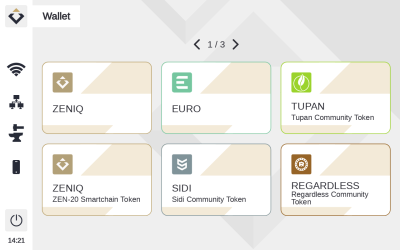
Wallet
a) Send Assets
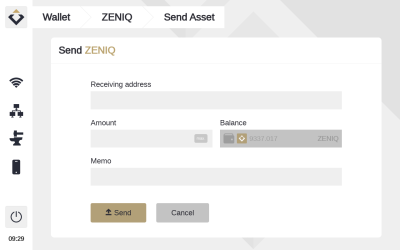
If you click on the „Send“ button, it leads to a new page with an address field appears:
Enter the receiving address, i.e. the address, to which you would like to transfer the amount, into the “receiving address” field.
Enter the desired amount into the “amount” field – by clicking on „max“, you will select the entire amount in your wallet.
You can create your own note in the „Memo“ field. Clicking in the field will open the keyboard.
Click on „Send“ to confirm the transaction.
Wallet
b) Receive Assets
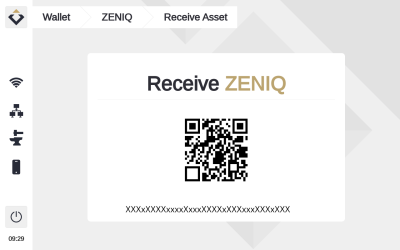
By clicking on the „Receive“ button, a new page opens.
There are 2 ways to receive coins/tokens:
Scan the QR code or
Enter the character sequence below the QR code into the wallet app or website.
Wallet
c) Transaction of Assets
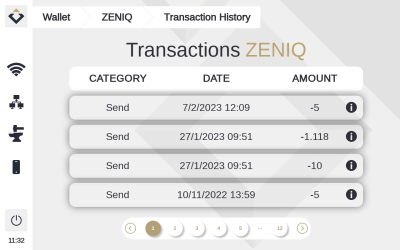
All your coin/token transactions that have been completed are listed in the “Transactions” page.
Category: Indicates if your transaction was sent or received.
Date: Shows you when the transaction was carried out.
Address: Indicates who the receiver or sender of your transaction was.
Amount: Shows you how much you sent to or received from others.
Comment: If comments were made by you, they will be displayed here.
Main menu
Your Tokens

These menu items will only appear if you have purchased them separately.
TUPAN
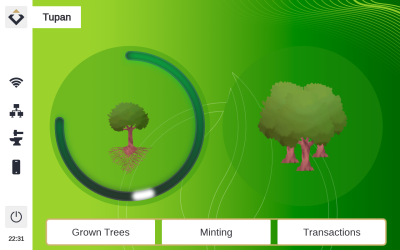
Under the menu item ‘’TUPAN’’, you will be able to access the screen where progress of currently cultivating tree is displayed.
Under the tree there are three buttons that lead you to:
Grown Trees
Minting
Transactions
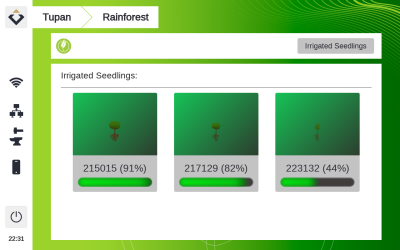
If you click on the image of three grown tree on the TUPAN main screen, you will be directed to the Rainforest screen. There, you will be able to choose between having an overview of the Irrigated Seedlings, or Irrigated Forest Giants.
Explanation:
- Irrigated Seedlings are unfinished trees from other users where you assisted their growth by irrigating them once. This earns you a certain amount of tokens when they are finished.
- Irrigated Forest Giants are finished trees from other users where you assisted their growth by irrigating them once. You have earned a certain amount of tokens that has been added to your TUPAN Token balance.
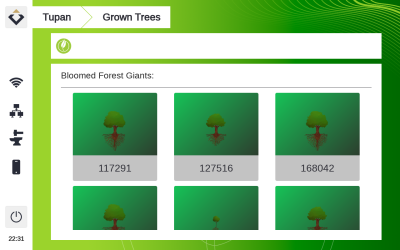
- Bloomed Forest Giants are finished trees that you have created together with a partner on another HUB. You have earned a certain amount of tokens that has been added to your TUPAN Token balance.
TUPAN
a) Grown Trees
Choosing the ‘’Grown Trees’’ button, you will have an overview of Bloomed Forest Giants. Selecting any of the Bloomed Forest Giants image, a pop-up window will appear that contains the following NFT information:
NFT ID
Tokens
Partner
Irrigators
TUPAN
b) Minting
Choosing the ‘’Minting’’ button, you will have an overview of the balance in TUPAN Token, as well as the recent minting transactions.
Depending on the chosen Minting Default Period in ‘’Settings’’, recent minting transactions will be displayed in 1 week, 1 month, or 1 year.
TUPAN
c) Transactions
Choosing ‘’Transactions’’ button, you will have an overview of the TUPAN transactions history.
Main menu
Your Tokens

SIDI
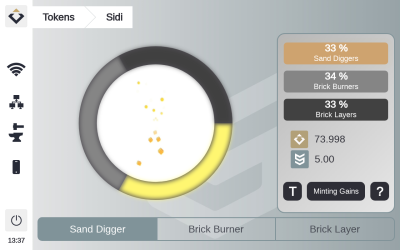
- Sand Digger: This role mints SidiSand tokens and sends them to the next role
- Brick Burner: This role uses SidiSand tokens to mints SidiBrick tokens and sends them to the next role
- Brick Layer: This role uses SidiBrick tokens to mint the final SIDI tokens
After the Brick Layer role completes SIDI Tokens they will be distributed to one of the minters in each role group. You can choose your current role freely at any time and change it as often as you want. This operation will cost a very small amount of ZENIQ Tokens as a network fee. Additionally there is a help screen and a token overview screen available where you can view your current balances for all tokens.

Main menu
Your Tokens

REGARDLESS
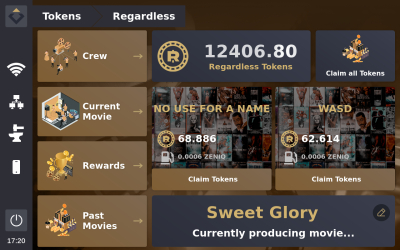
Regardless is a movie studio that recruits crew and produces movies in order to earn Regardless tokens. You can see your current balance on the main screen as well as your most recent movies. Here you also have the ability to rename your movie studio.
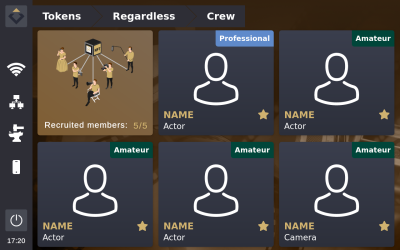
The crew screen shows you which people have been recruited to fill the requirement of 5 crew members.
The current movie screen shows you how many of the required 10 takes you have completed in order to finish the movie production.
The rewards screen shows all of your most recent minting gains.
The past movies screen shows all of your produced movies. Additionally you have the ability to claim tokens from all of your movies, either individually or all at once.
Main menu
Your Tokens

TDRONE
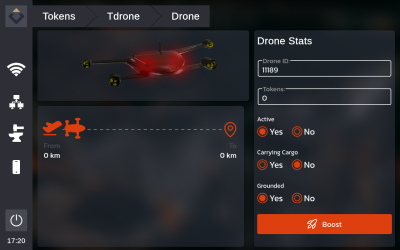
TDrone is your personal transport drone that generates tokens for you. You can see some statistics on the main screen as well as jump to the Drone, Rewards and About sections.
The Drone sections shows the current flight path as well as basic information about your drone. Additionally you can boost your drone to generate more tokens for you. You can use WZENIQ, TUPAN and AVINOC for boosting.
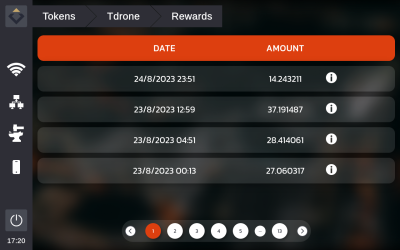
The rewards screen shows all of your most recent minting gains.
The about screen tells you some basic information about the TDrone project.
Main menu
Your Tokens

VOO
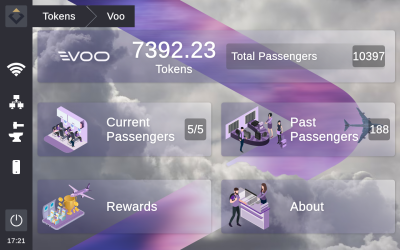
Voo is an aviation project that transports passengers between multiple stops and generates tokens for you. Passengers can take selfies along the way as well. The main screen shows you an overview of your Voo minting project as well as links to the current passengers, past passengers, rewards and about sections.
The current passengers screen shows you all passengers that are currently in the air for you, up to a total of 5 passengers.
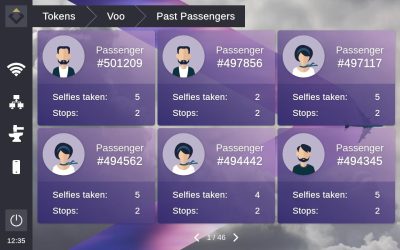
The past passengers screen shows you all passengers that ever travelled with you during the duration of your Voo minting project.
The rewards screen shows all of your most recent minting gains.
The about screen tells you some basic information about the Voo project.
You can also transfer your minter to the NOMO App from the main screen.
Main menu
Your Tokens

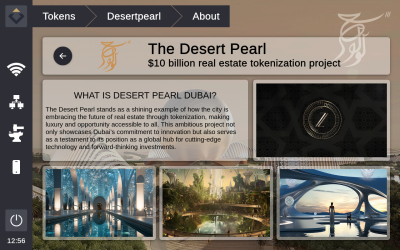
DESERTPEARL
The Desert Pearl stands as a shining example of how the city is embracing the future of real estate through tokenization, making luxury and opportunity accessible to all. This ambitious project not only showcases Dubai’s commitment to innovation but also serves as a testament to its position as a global hub for cutting-edge technology and forward-thinking investments.
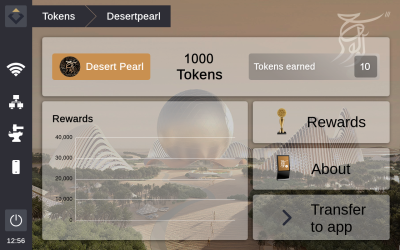
The main screen shows you an overview of your Desert Pearl minting project as well as links to the rewards and about section. It also features a graph that tracks your minting gains.
The rewards screen shows all of your most recent minting gains.
The about screen tells you some basic information about the Desert Pearl project.
You can also transfer your minter to the NOMO App from the main screen.
Main menu
MINTING
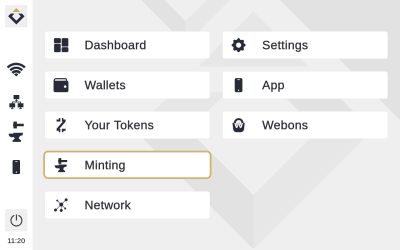
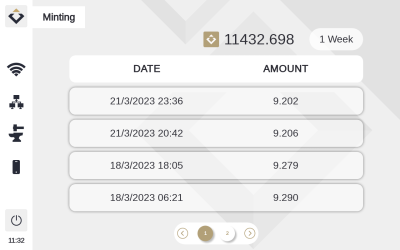
You will find your current balance of ZENIQ coins under the menu item „Minting“. By clicking on this button, you will get an overview of the latest minting operations.
You will find your current balance of ZENIQ coins
Date: Shows when the coins/tokens were minted.
Coins: Shows the current amount of minted coins.
Minting Default Period: You can choose between 1 Week, 1 Month, or 1 Year.
Main menu
NETWORK
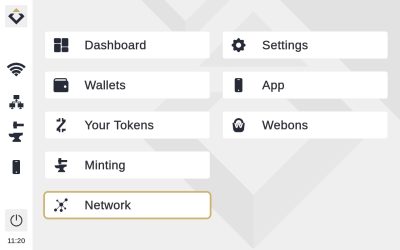
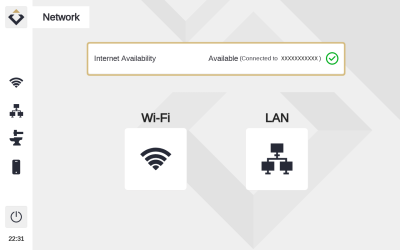
Be sure to have a stable internet connection for a clean minting function of your ZENIQ Hub. You can adjust the settings via the menu entry „Network“.
You find information about the Internet Availability of your network on that page.
The green check indicates that the connection is good and the device has access to the Internet
The orange exclamation mark shows that your device is connected to the network, but has no access to the Internet (In case you cannot connect, contact your internet provider).
The red exclamation mark, means that the device is not connected and there is no availability.
As already described under Initial Setup, you can choose your preferred network: LAN or Wi-Fi.
Main menu
SETTINGS
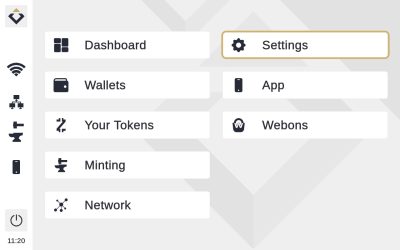
If you want to make changes to the general settings of your ZENIQ Hub, go to the entry “Settings”.
A new page will open:
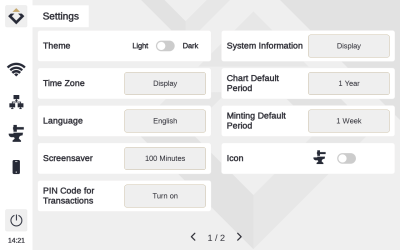
- Theme: You can choose between a light and a dark theme. The light theme is the default setting.
- Time Zone: Select the time zone you are currently in. Additionally, you are able to select Daylight Saving Time if it applies to the time zone you are currently in.
- Language: Select your preferred language (German and English language are available).
- Screensaver: Select a time. After that period of time, the unit will go into sleep mode and the screensaver will be activated. The value is given in minutes, from 5-100 minutes. You can also switch the screensaver off.
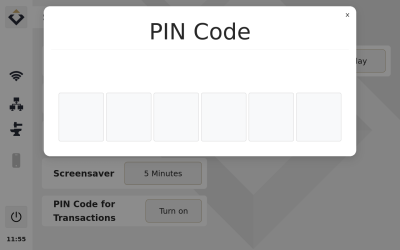
- PIN Code for Transactions: Protect your transactions and your coins with a PIN Code.
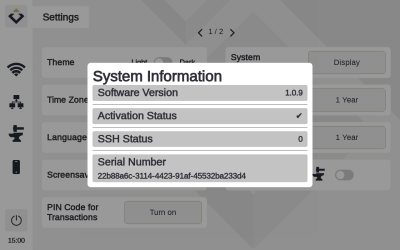
- System Information: Displays the Software Version of your Hub, the Activation Status, SSH Status, and Serial Number of your device.
- Chart Default Period: You can choose between 1 Week, 1 Month, or 1 Year.
- Minting Default Period: You can choose between 1 Week, 1 Month, or 1 Year.
- Icon: You can choose between an anvil and Pac-Man animated minting and sidebar icon.
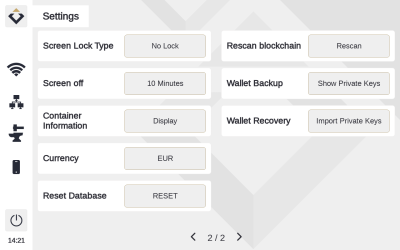
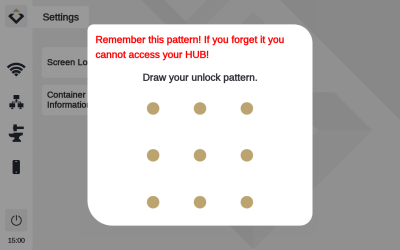
- Screen Lock Type: Protect your device by setting up a Lock Password, or a Pattern Lock.
- Screen Off: Turn the screen completely off a certain number of minutes after the screensaver. The value is given in minutes, from 5-100 minutes.
- Container Information: You have an overview of the components that make up the Hub interface.
- Currency: Choose between USD and EUR as the currency used on the Hub
- Reset database: This will delete the local caching database to fix data inconsistencies or other error
- Rescan blockchain: This will resync the ZENIQ chain if there are issues with the balance
- Wallet Backup: Show both of your private keys in an encrypted format for ZENIQ and EURO
- Wallet Recovery: Import both of your private keys in an encrypted format for ZENIQ and EURO
Settings
a) PIN code for Transactions
The payment function is further protected by a six-digit number combination.
The PIN entry will be accepted when the last digit of a 6-digit combination has been entered. No confirmation is necessary.
Settings
b) Screen Lock Type
Your device is further protected by a Lock Password or a Pattern Lock.
You can choose between a password or a pattern.
Write down your password/pattern and keep it save.
To Look your device select the power button and choose ‘’Lock’’ option.
Settings
c) Serial number
The “System Information” under “Settings” gives you general information about your ZENIQ Hub:
It contains the serial number of your device as well as the current software version, SSH status, and activation status. You will need the serial number for activating your device.
Main menu
App
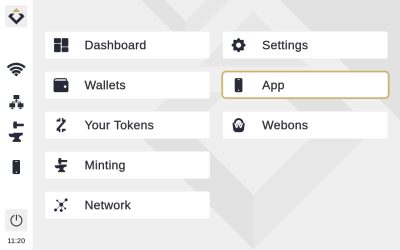
This menu item allows you to display the QR Code to connect your Zeniq HUB to the NOMO App. Click the Connect Button and the QR Code will be displayed. Follow the instructions on the screen to connect your Zeniq HUB and NOMO App. Now you will be able to display balances and transactions for most assets on your NOMO App.
Main menu
WebOns
This menu item allows you to learn about WebOns and launch them with the Discover WebOn. You can also request support for WebOns by using the button with the question mark in the lower right. Additionally there are shortcuts for the WebOns info page and the support page where you can see a list of the tickets you created.
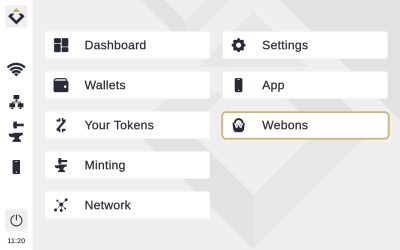
Left menu bar
LEFT MENU
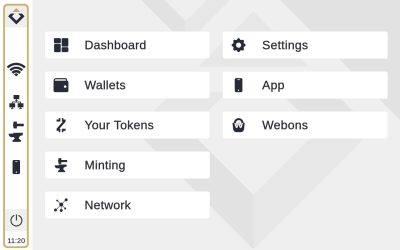
On the left side, you will find the menu bar with status information:
Home button and breadcrumb navigation
Internet connection
Minting symbol
Pairing with NOMO App
Power button
Time
Left menu bar
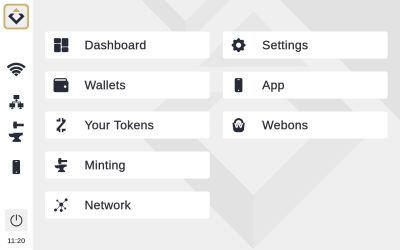
a) Home button and
breadcrumb navigation
The home button always leads back to the main menu.
Some menu items consisting of several levels feature an additional navigation option:
To give you an overview of the different levels, the navigation path of the submenu items is displayed (the so-called breadcrumbs).
This feature makes it possible to go back one step within a menu item if there are several menu levels.
Left menu bar
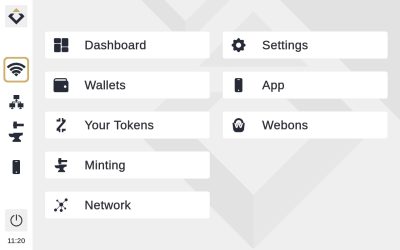
b) Internet connection
Internet connection: Wi-Fi and LAN.
A stable internet connection is essential for the ZENIQ Hub to be able to mint coins. If there is no internet connection, the icons will be displayed in light grey color with a small red sign. Whenever there is a stable internet connection, the icons are colored black in light mode and colored white in dark mode.
Left menu bar
c) Minting icon
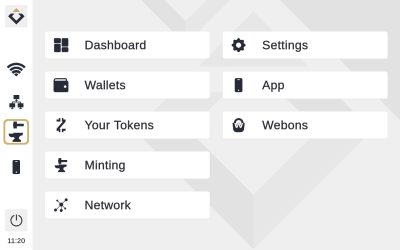
The minting icon indicates whether the Hub is currently minting. If the symbol is animated, the minting status is active. If the icon is colored light grey with a red exclamation mark sign, then there is no minting going on at the time.
Left menu bar
d) NOMO App
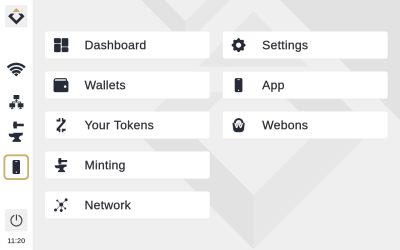
Pairing with the NOMO App: The function to connect the ZENIQ Hub with the NOMO App.
Left menu bar
e) Power button
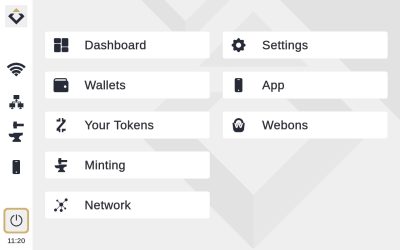
The power button can be used to lock, shut down, or restart the ZENIQ Hub.
To lock your device:
-
Select the power button and choose ‘’Lock’’ option. (Before you do so make sure you know your pattern or password)
-
To unlock the Hub, enter the previously set password (see Settings > Screen Lock Type)
To power off or restart your device:
-
Select the power button if you want to restart or turn off your ZENIQ Hub.
-
Click on the button and wait until the ZENIQ Hub screen is black and the power lights through the casing at the ZENIQ Hub´s power plug are no longer visible.
DO NOT POWER OFF THE ZENIQ HUB BY UNPLUGGING IT FROM THE POWER PLUG WITHOUT DOING A POWER OFF BY THE SOFTWARE. We do not take any responsibility for any damage caused by such an action.
Left menu bar
f) Time
The current time is displayed at the bottom of the left menu bar. The time can be changed in “Settings” (see Settings) by selecting the time zone.
